This is default featured slide 1 title

Go to Blogger edit html and find these sentences.Now replace these sentences with your own descriptions.

This is default featured slide 2 title

Go to Blogger edit html and find these sentences.Now replace these sentences with your own descriptions.

This is default featured slide 3 title

Go to Blogger edit html and find these sentences.Now replace these sentences with your own descriptions.

This is default featured slide 4 title

Go to Blogger edit html and find these sentences.Now replace these sentences with your own descriptions.

This is default featured slide 5 title

Go to Blogger edit html and find these sentences.Now replace these sentences with your own descriptions.

*/
레이블이 Qt인 게시물을 표시합니다. 모든 게시물 표시

Python - VS Code에서 Qt Designer로 GUI 개발

VS Code에서 작업할 디렉토리를 선택(여기서는 test01폴더)하고 오른쪽 마우스를 클릭한다.
팝업 메뉴의 제일 아래쪽 PyQT: New Form을 선택하면 Qt Designer가 실행 된다.

새 폼(New form) 창이 뜨며 아래 5가지 Form 중에서 하나를 선택할 수 있다
  • Dialog with Buttons Bottom  - Dialog 타입, OK, Cancel 버튼이 하단 오른쪽에 위치
  • Dialog with Buttons Right - Dialog 타입, OK, Cancel 버튼이 오른쪽 상단에 위치
  • Dialog without Buttons - Dialog 타입, 버튼 없음
  • Main Window - Main window 타입, 상단에 메뉴바, 하단에 상태바
  • Widget - Widget 타입


참고

VS Code에서 Python 과 Qt5 사용하기

설치환경

  • OS : Windows 10
  • Python version : 3.7.9

설치순서

  1. CMD 실행
  2. 프롬프트상에 pip install qt5-tools 입력

  3. 설치된 PyQt의 버전을 확인 pip show pyqt5 입력
  4. vscode를 실행
  5. Extentions(Ctrl+Shift+X)에서 PyQt integration을 찾아 install

  6. vscode에서 새로운 파일(test.py)을 만들고 아래 코드를 넣는다.
    import sys
    from PyQt5.QtWidgets import QApplication, QWidget

    class MyApp(QWidget):

        def __init__(self):
            super().__init__()
            self.initUI()

        def initUI(self):
            self.setWindowTitle('My First Application')
            self.move(300, 300)
            self.resize(400, 200)
            self.show()


    if __name__ == '__main__':
       app = QApplication(sys.argv)
       ex = MyApp()
       sys.exit(app.exec_())
  7. 화면 오른쪽 상단의 삼각형 버튼을 눌러 코드를 실행한다.
  8. 화면 상에 창이 만들어졌는지 확인한다.

참고자료

Windows환경에서 Qt 개발환경 구축하기 - 2/2

Qt Creator 설치하기 - 2

Windows환경에서 설치 

Qt Creator 설치하기 - 1페이지에서 다운로드 받은 인스톨 파일(qt-unified-windows-x86-3.1.1-online.exe)을 실행한다.
Qt계정, Qt확장모듈의 가격 등과 라이센스들을 확인할 수 있다. 그냥 "Next" 버튼을 클릭한다.
Qt 계정이 있으면 기입하고, 계정이 필요하면 등록한다.. 여기서는 그냥 "Skip" 버튼을 클릭

Setup 화면에서 Setting은 그대로 두고 "Next"버튼 클릭
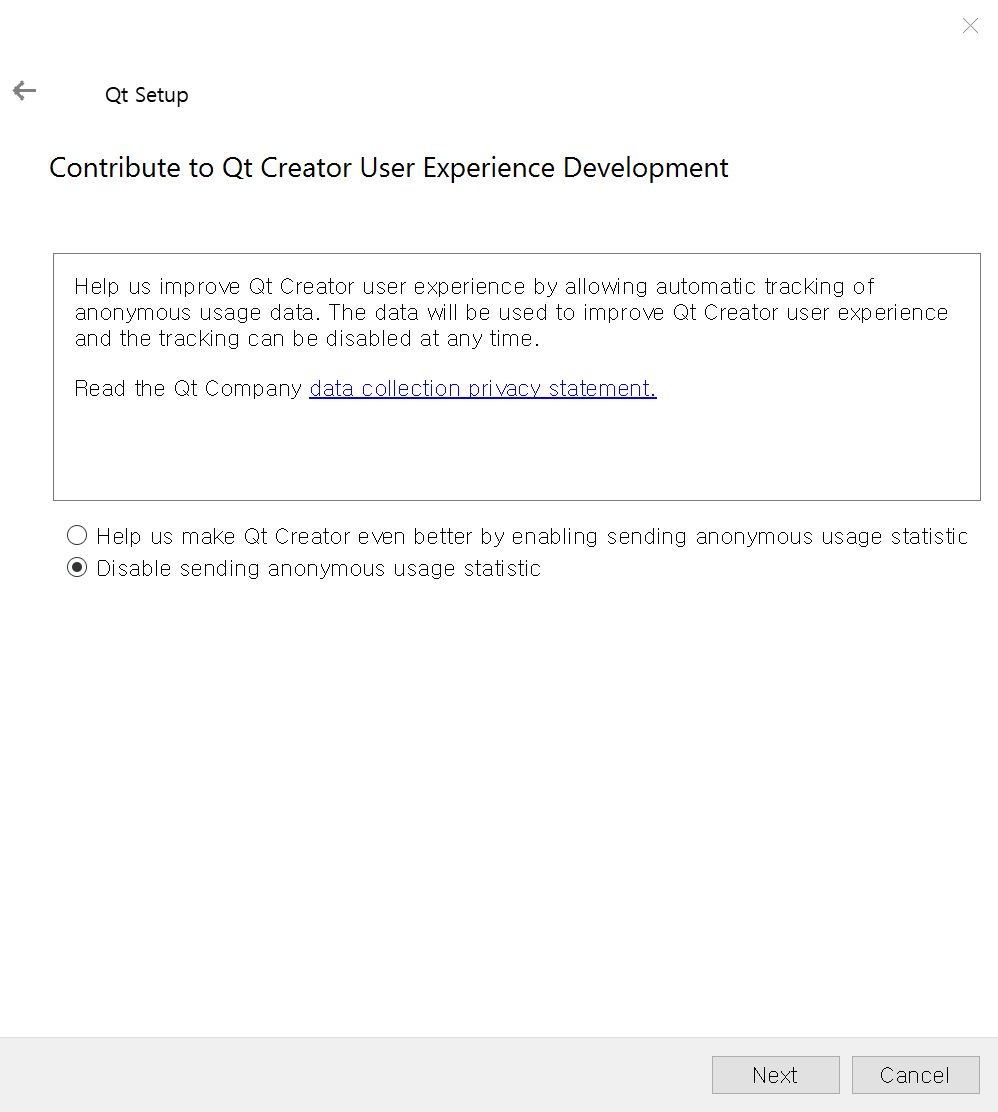
뭔가 보내는건 언제나 Disable.... "Next"
설치 폴더를 정해주세요.. 그리고.. "Next"
설치할 컴포넌트 선택에서 Qt버전은 1.12.6으로하고 거기에 컴파일러는 MinGW 7.3.0 64bit로선택한다.  선택해도 실제 컴파일러는 설치되지 않는다.
MinGW 와 Cmake는 위와 같이 Developer and Designer Tools에서 선택하면 자동으로 설치된다. Visual Studio(MSVC)를 선택할 경우 별도로 설치해야한다.
라이센스 사용에 동의 체크하고 "Next"
"Install"버튼을 클릭하면 선택된 컴포넌트들이 차래로 설치된다.
Completing the Qt wizard가 나오면 설치 끝...


Windows환경에서 Qt 개발환경 구축하기 - 1/2

Qt Creator 설치하기 - 1

Qt Creator 설치파일 다운로드 

Qt개발환경인 Qt Creator는 https://www.qt.io/download에서 구매하거나 무료 다운로드 할 수 있다.
여기에서는 아래와 같이 오픈소스유저를 위한 다운로드를 진행합니다.

"Go open source"버튼을 클릭하여 Open Source Qt Use 페이지로 이동하여 Open Source에 관련된 내용을 확인 후 맨 아래쪽 "Download the Qt Online installer"를 클릭한다.
Your download 페이지에서 현재 접속하고 있는 PC의 운영체제와 시스템을 확인하고 아래쪽 "Download"를 클릭한다.
현재 PC의 운영체제에 맞는 실행 파일이 자동 다운로드된다.
적당한 위치에 실행파일을 다운로드 받는다.

다음 - Qt Creator 설치하기